


Correct installation is crucial for your LED Bathroom Mirror Light GM1111. It ensures safe operation and full functionality. Proper maintenance offers significant benefits. It preserves the mirror’s aesthetic and its advanced features. Adhering to these guidelines ensures the longevity of your fixture. It also guarantees optimal performance for years. This approach maximizes your investment.
Key Takeaways
- Always turn off the power at the circuit breaker before starting any installation work.
- Gather all necessary tools and materials, like a drill and screwdriver, before you begin.
- Carefully unbox the mirror and check for any damage before installation.
- Choose the right spot for your mirror. Mark the wall accurately for a straight installation.
- Connect the electrical wires carefully. Make sure to ground the fixture for safety.
- Clean your mirror regularly with mild cleaners. Avoid harsh chemicals to protect its surface.
- Ensure good bathroom ventilation. This prevents moisture from damaging the mirror.
- Consider professional installation for electrical safety, especially in bathrooms.
Pre-Installation Planning for Your LED Bathroom Mirror Light GM1111
Safety First for Your LED Bathroom Mirror Light GM1111
Disconnecting Power Supply
Before beginning any installation, always prioritize safety. Locate the circuit breaker that controls the bathroom’s electrical supply. Turn off the power to prevent electrical shock. Confirm the power is off using a voltage tester at the intended installation site. This step is critical for a safe installation process.
Essential Personal Protective Equipment
Wear appropriate personal protective equipment (PPE) during installation. Safety glasses protect eyes from dust and debris. Work gloves shield hands from potential cuts or abrasions. Consider a dust mask if drilling into drywall or plaster. These items ensure personal safety throughout the project.
Gathering Tools and Materials for Your LED Bathroom Mirror Light GM1111
Required Installation Tools
Successful installation requires specific tools. Gather a drill, a screwdriver set (Phillips and flathead), a tape measure, and a pencil. A level ensures the mirror hangs straight. A stud finder helps locate wall studs for secure mounting. These tools facilitate a smooth installation.
Additional Mounting Materials
Depending on your wall type, you may need additional mounting materials. Wall anchors are necessary for drywall installations. Longer screws might be required for thicker wall surfaces. Always use hardware suitable for the weight of the LED Bathroom Mirror Light GM1111. This ensures a stable and secure fixture.
Unboxing and Initial Inspection of Your LED Bathroom Mirror Light GM1111
Verifying Package Contents
Carefully unbox the LED Bathroom Mirror Light GM1111. Check the package contents against the provided packing list or manual. Ensure all components, including mounting hardware and instructions, are present. This prevents delays during installation.
Checking for Any Shipping Damage
Inspect the mirror and all components for any signs of shipping damage. Look for cracks, chips, or bent parts. If you find any damage, contact the supplier immediately. Document any issues with photographs. This ensures you receive a product in perfect condition.
Understanding Your LED Bathroom Mirror Light GM1111 Features
Key Product Features Overview
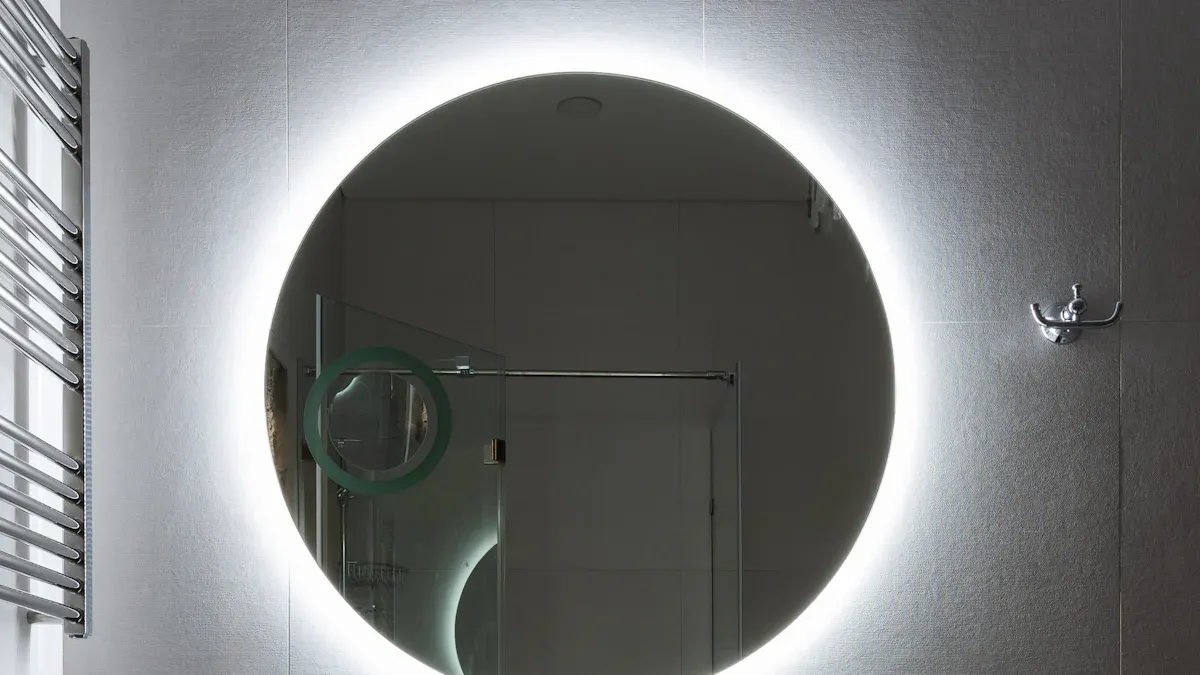
The LED Bathroom Mirror Light GM1111 offers several advanced features. These features enhance user experience and functionality. It includes integrated LED lighting. Users can often adjust the brightness of this lighting. Many models also allow changes in color temperature. This means users can switch between warm white, cool white, or daylight tones. An anti-fog function is a common and highly valued feature. It keeps the mirror surface clear after hot showers. This eliminates the need for wiping. Touch sensor controls provide easy operation. Users simply tap the mirror surface to turn the light on or off. They also use these sensors to adjust settings. Some models include a memory function. This function remembers the last light settings. It applies them automatically when users turn the mirror on again.
Technical Specifications and Requirements
Understanding the technical specifications ensures proper installation and optimal performance. The LED Bathroom Mirror Light GM1111 typically requires a standard electrical input. This usually falls within 100-240V AC at 50/60Hz. Users must confirm their home’s electrical supply matches these requirements. The mirror’s dimensions are crucial for placement. Manufacturers provide specific measurements for width, height, and depth. Always check these dimensions against the intended wall space. The product also carries an IP rating. This rating indicates its resistance to water and dust. A higher IP rating means greater protection, which is essential for bathroom environments. For example, an IP44 rating signifies protection against splashing water. The installation type is typically wall-mounted. This requires a secure attachment to a sturdy wall surface. Operating temperature ranges are also specified. These ranges ensure the mirror functions correctly in various bathroom climates. Always consult the product manual for precise details on power consumption and other specific requirements.
Step-by-Step Installation Guide for Your LED Bathroom Mirror Light GM1111
Strategic Placement and Marking for Your LED Bathroom Mirror Light GM1111
Identifying the Ideal Mounting Location
Choosing the correct location for your mirror light is essential. Consider the height of your vanity and your eye level. The light should illuminate your face evenly without casting shadows. For bar lights installed above the bathroom mirror, the recommended height is generally 75 to 80 inches from the floor. If you use vanity sconce lights placed on the sides of a mirror, the suggested installation height is typically 60 to 70 inches above the floor. When selecting linear bath lights for above a bathroom mirror, the fixture should ideally be at least three-quarters the width of the mirror. It should not extend beyond its edges. For larger mirrors, consider using a pair of evenly spaced linear sconces. This ensures balanced lighting.
Accurate Measuring and Wall Marking
Once you determine the ideal location, accurately measure and mark the wall. Use a tape measure to find the center point of your desired installation area. Mark this point with a pencil. Then, use the mounting template provided with your LED Bathroom Mirror Light GM1111, or measure the distance between the mounting holes on the bracket. Transfer these measurements to the wall. Use a level to ensure all marks are perfectly horizontal. This guarantees a straight and aesthetically pleasing installation.
Securely Mounting the Bracket for Your LED Bathroom Mirror Light GM1111
Drilling Pilot Holes for Stability
After marking the wall, prepare to drill pilot holes. Select a drill bit appropriate for your wall material and the size of your mounting screws. If you are drilling into wall studs, a smaller pilot hole is sufficient. For drywall, you will need to drill holes large enough for wall anchors. Drill slowly and steadily at each marked point. Ensure the holes are deep enough to accommodate the screws or anchors fully.
Fastening the Mounting Bracket
Attach the mounting bracket to the wall. Align the bracket with the pilot holes you just drilled. Insert the screws through the bracket and into the wall. If using wall anchors, insert them first, then secure the bracket with screws. Tighten all screws firmly. Do not overtighten, as this can damage the wall or the bracket. The bracket must be completely stable and secure. It will support the weight of the mirror light.
Electrical Wiring Connections for Your LED Bathroom Mirror Light GM1111
Identifying Electrical Wires
Before making any electrical connections, confirm the power is off at the circuit breaker. Identify the electrical wires coming from the wall and from your mirror light. Typically, you will find three types of wires:
- Black (or sometimes red): This is the “hot” or “live” wire. It carries electrical current.
- White: This is the “neutral” wire. It completes the circuit.
- Green or bare copper: This is the “ground” wire. It provides a path for fault current.
Connecting Live and Neutral Wires
Connect the corresponding wires from the mirror light to the wires from the wall. Twist the black (hot) wire from the mirror light together with the black (hot) wire from the wall. Use a wire nut to secure this connection. Repeat this process for the white (neutral) wires. Ensure each connection is tight and secure. There should be no exposed copper wire outside the wire nut.
Proper Grounding of the Fixture
Proper grounding is crucial for safety. Connect the green or bare copper ground wire from the mirror light to the ground wire from the wall. Secure this connection with a wire nut. All bathroom electrical circuits must be protected by Ground Fault Circuit Interrupters (GFCIs) to prevent electric shock. Always hire a qualified electrician for installation to ensure compliance with local electrical codes and safety standards. Light fixtures installed in bathrooms, especially the LED Bathroom Mirror Light GM1111, must be rated for damp or wet locations to suit humid environments.
Securing All Wire Connections
After connecting all wires, carefully tuck them into the electrical box in the wall. Ensure no wires are pinched or strained. Use wire nuts to secure all connections firmly. The NEC 2017 110.14(D) mandates that ‘where a tightening torque is indicated as a numeric value on equipment or in installation instructions provided by the manufacturer, a calibrated torque tool shall be used to achieve the indicated torque value, unless the equipment manufacturer has provided installation instructions for an alternative method of achieving the required torque.’ This ensures optimal electrical contact and safety.
Attaching the LED Bathroom Mirror Light GM1111
Aligning the Mirror to the Bracket
Careful alignment ensures a professional and aesthetically pleasing installation. First, measure the wall area and the mirror’s dimensions. Use a pencil or painter’s tape to mark the top edge and center line on the wall. Then, verify this alignment with a level. This step ensures the mirror hangs perfectly straight. For larger mirrors, ask a helper to assist with lifting and leveling. This teamwork prevents accidents and ensures accuracy. Position the mirror so its edges neatly frame any outlets or hide them behind the mirror. This creates a tidy appearance.
Securing the Mirror to the Mounting Bracket
With the mirror aligned, proceed to secure it to the pre-installed mounting bracket. The LED Bathroom Mirror Light GM1111 typically uses an integrated bracket system or D-rings for secure attachment. Gently position the mirror against the wall, carefully engaging the mirror’s hanging mechanism with the wall bracket. If using clips, slide the mirror into place and tighten the top clips to secure it. After mounting, gently wiggle the mirror to ensure all anchors and the bracket are secure. If any movement occurs, re-evaluate the anchors. Tighten screws until secure, but avoid excessive force. This prevents damage to the wall or the mirror. Always ensure the workspace is clear of fragile items. Wear safety glasses when drilling and gloves when handling the mirror. Lift the mirror carefully, bending at the knees and keeping your back straight, as mirrors can be deceptively heavy. For lighted mirrors, check power cords before plugging them in. Avoid installing wiring near damp surfaces without professional help.
Initial Power-Up and Testing Your LED Bathroom Mirror Light GM1111
Restoring Electrical Power
After successfully attaching the mirror and securing all connections, restore electrical power. Return to the circuit breaker panel and flip the switch back to the “ON” position. This re-energizes the bathroom circuit.
Verifying Basic Functionality
With power restored, proceed to verify the mirror light’s basic functionality. Activate the mirror light using its touch sensor or wall switch. The light should illuminate immediately. If the light does not turn on, perform some basic checks. First, verify the power connection. Ensure the power cord is firmly plugged in. Test the electrical outlet with another device to confirm it has power. Inspect the mirror’s cord for any visible damage. Also, check your circuit breaker panel for any tripped switches. For mirrors with touch sensors, clean the sensor area. Remove any interfering objects. Try resetting the mirror by unplugging it for five minutes.
Testing Dimming and Color Temperature
Once the light illuminates, test its advanced features. Use the touch controls on the mirror to adjust the brightness levels. Confirm the dimming function works smoothly across its full range. Next, test the color temperature options. Cycle through the available settings, such as warm white, cool white, and daylight tones. Ensure each setting functions correctly and provides the desired ambiance. This comprehensive testing confirms the optimal performance of your LED Bathroom Mirror Light GM1111.
Essential Maintenance Tips for Your LED Bathroom Mirror Light GM1111

Proper maintenance significantly extends the life and preserves the functionality of your LED Bathroom Mirror Light GM1111. Regular care prevents common issues and keeps the mirror looking its best.
Routine Cleaning Practices for Your LED Bathroom Mirror Light GM1111
Consistent cleaning maintains the mirror’s clarity and prevents buildup. This also protects its integrated electronic components.
Recommended Cleaning Solutions
Users should select appropriate cleaning agents for mirror surfaces. A mild, ammonia-free glass cleaner works effectively. Alternatively, a mixture of equal parts distilled water and white vinegar provides a safe solution. These options prevent damage to the mirror’s surface or LED components. Avoid using harsh chemicals, ammonia-based cleaners, or abrasive materials. These substances can degrade sensitive coatings on LED mirrors. Bleach and overly acidic products also cause damage. They can cloud the surface, compromise anti-fog coatings, or harm LED strips.
Proper Cleaning Techniques
Always apply the chosen cleaner onto a clean microfiber cloth. Never spray directly onto the mirror. Direct spraying allows moisture to seep behind the glass. This can cause black spots, especially in LED-lit models. Gently wipe the mirror surface with the damp cloth. Use a second dry microfiber cloth to buff the mirror. This prevents streaks and water spots. For stubborn dirt, a mild soap or detergent diluted in warm water can be used. Distilled water helps prevent streaks.
Optimal Cleaning Frequency
Regular cleaning is crucial for maintaining your mirror light. Cleaning LED strips and the mirror monthly prevents dust buildup. Dust can cause the lights to overheat and reduce their lifespan. For general maintenance, cleaning at least once a week ensures a clear, spotless surface. This also prolongs the mirror’s lifespan. Households with high humidity or larger families may need daily cleaning. This removes moisture and prevents mold growth.
Troubleshooting Common Issues with Your LED Bathroom Mirror Light GM1111
Users may encounter occasional issues with their mirror light. Simple troubleshooting steps often resolve these problems.
Addressing Light Not Turning On
First, check the power supply. Ensure the circuit breaker for the bathroom is in the “ON” position. Verify the mirror’s power cord is securely plugged into the outlet. Test the outlet with another device to confirm it receives power. Inspect the mirror’s cord for any visible damage. If the mirror has a wall switch, ensure it is functioning correctly.
Resolving Flickering or Dimming Problems
Several factors can cause flickering or dimming in LED mirror lights.
- Driver Malfunctions: The LED driver converts AC to DC power. If it fails, irregular power conversion causes flickering. Age, heat, or poor quality can wear out drivers.
- Voltage Fluctuations: Inconsistent electrical supply, from power surges or overloaded circuits, leads to flickering. This occurs more often in older homes.
- Incompatible Dimmer Switches: Dimmers designed for incandescent bulbs often do not work with LEDs. LEDs require specific dimmers for proper power regulation.
- Loose or Faulty Wiring: Poor electrical connections in the circuit, fixture, or switch disrupt electricity flow. This results in flickering.
- Overloaded Circuits: Too many devices on one circuit cause voltage drops. This makes LED lights flicker.
- Low-Quality LED Bulbs: Cheap LED bulbs may lack proper circuitry. They handle voltage fluctuations poorly, leading to flickering.
- Capacitor Issues: Capacitors smooth electrical currents. A failing capacitor causes uneven power delivery and flickering.
Fixing Touch Sensor Malfunctions
A non-responsive touch sensor can be frustrating. First, clean the sensor area. Dust and grime accumulate, preventing correct function. Use a microfiber cloth to gently clean the sensor. Next, test the switch. Press it multiple times or try different settings. If it remains unresponsive, the switch may need replacement. Consult the manufacturer’s guidelines for replacement. Some mirrors feature easily replaceable detachable switches.
Preventing Condensation Inside the Mirror
Condensation inside the mirror can affect performance and longevity.
- Install an exhaust fan: Choose a fan with appropriate CFM for your bathroom size. Run it during and for at least 20 minutes after showers. Consider models with humidity sensors. Ensure the fan vents outside, not into the attic.
- Utilize natural ventilation: Open windows after showering. This releases humid air. Combine this with an exhaust fan for optimal moisture control.
- Employ heat lamps: These provide warmth. They speed up drying and reduce condensation on surfaces. Many come with integrated exhaust fans.
- Use LED bulbs: LED lights emit less heat compared to traditional bulbs. This helps reduce temperature-related condensation.
Extending the Lifespan of Your LED Bathroom Mirror Light GM1111
Proactive measures significantly contribute to the longevity of your mirror light.
Avoiding Harsh Cleaning Chemicals
Harsh chemicals degrade LED mirror light components. Ammonia-based cleaners cloud the surface. They also degrade anti-fog coatings or compromise LED strips. Bleach causes similar damage to the mirror’s coating and LED lights. Overly acidic products also cause damage. Abrasive wipes can harm the mirror’s surface and LED components. Always stick to mild, recommended cleaning solutions.
Ensuring Proper Bathroom Ventilation
Good ventilation is paramount for electronic fixtures in bathrooms. It prevents excessive moisture buildup. An effective exhaust fan removes humid air. This reduces the risk of moisture-related damage to the mirror’s internal components.
Environmental Considerations for Longevity
Maintaining optimal environmental conditions helps prolong the life of electronic fixtures. For occupied areas, including bathrooms, humidity levels between 40-60 percent are recommended. This protects electronic devices. Significant damage from humidity is unlikely unless levels consistently exceed 80 percent for extended periods.
Optimizing Performance of Your LED Bathroom Mirror Light GM1111
Users can enhance the functionality of their mirror light. This section explores ways to maximize its potential.
Smart Home Integration for Your LED Bathroom Mirror Light GM1111
Integrating the mirror light into a smart home system offers convenience. It allows for centralized control.
Compatibility with Smart Home Systems
The LED Bathroom Mirror Light GM1111 often works with popular smart home platforms. These include Amazon Alexa, Google Assistant, and Apple HomeKit. Users should check the product specifications for specific compatibility. This ensures seamless integration with existing smart devices.
Step-by-Step Setup Procedures
Setting up smart home integration typically involves a few steps. First, download the manufacturer’s app. Next, connect the mirror light to the home Wi-Fi network. Then, link the manufacturer’s app to the chosen smart home platform. Follow the on-screen instructions within each app. This process enables voice control and remote management.
Customizing Light Settings on Your LED Bathroom Mirror Light GM1111
Personalizing light settings improves user experience. It allows the mirror to adapt to different needs.
Adjusting Brightness Levels
Users can easily adjust the brightness of their mirror light. Most models feature touch controls on the mirror surface. A simple tap or hold often changes the intensity. This allows for bright task lighting or softer ambient illumination.
Changing Color Temperature Options
The mirror light also offers various color temperature settings. Users can switch between warm white, cool white, or daylight tones. This feature helps create different moods. It also assists with accurate makeup application. Touch controls or smart home apps typically manage these adjustments.
Future Enhancements for Your LED Bathroom Mirror Light GM1111
Technology evolves constantly. Future enhancements can further improve the mirror light.
Exploring Potential Add-ons
Manufacturers may introduce new accessories. These could include integrated speakers or advanced sensors. Such add-ons would expand the mirror’s capabilities. Users should stay informed about new product releases.
Understanding Firmware Updates
Firmware updates provide improvements and new features. These updates are software revisions for the mirror’s internal system. Users can often download and install them through the manufacturer’s app. Regular updates ensure optimal performance and security.
Safety Precautions and Warnings for Your LED Bathroom Mirror Light GM1111
Users must prioritize safety when installing and using the LED Bathroom Mirror Light GM1111. Adhering to safety guidelines protects both the user and the product.
Electrical Safety Reminders for Your LED Bathroom Mirror Light GM1111
Electrical safety is paramount, especially in bathroom environments. These areas present unique challenges due to moisture.
Professional Installation Recommendation
Always consider professional installation for electrical fixtures in wet locations. A licensed electrician ensures compliance with local codes. They also guarantee safe wiring practices. This minimizes risks associated with electrical work.
Avoiding Water Exposure to Components
Water and electricity pose significant hazards. Maintaining clearances from water outlets is crucial. This minimizes moisture exposure. It safeguards both the mirror’s lifespan and your household. Inexpensive mirrors from unverified sellers often entail hidden compromises. These include inferior manufacturing processes, subpar materials, and lackluster safety standards. Such products can expose users to electrical hazards. For electrical installations in wet locations like bathrooms, specific safety standards apply.
- Ground Fault Circuit Interrupters (GFCIs) are essential for wet areas. GFCIs automatically shut off power upon detecting a ground fault. This prevents electrical shock.
- Protective Covers shield outlets from moisture. Use waterproof and weatherproof covers. This reduces corrosion and short circuits.
- Proper Wiring Installation requires cables designed for damp or wet conditions. Ensure indoor wiring is properly insulated. Route it away from water sources.
- Strategic Outlet Placement is also important. Position outlets at least 6 feet away from water sources. This includes sinks, showers, or bathtubs.
- Regular Testing and Inspection are crucial. Test GFCI outlets monthly. Licensed electricians should perform regular inspections. They identify and address potential issues.
- Electrical Panel Upgrades may be necessary. This applies if installing multiple outlets in wet areas. Upgrades handle increased load and provide adequate protection.
Proper Handling and Care of Your LED Bathroom Mirror Light GM1111
Careful handling and proper disposal extend the life of your mirror light. They also protect the environment.
Preventing Impact Damage
The mirror surface is glass. It is susceptible to impact damage. Handle the mirror with care during installation and cleaning. Avoid dropping or striking the mirror. Store it securely if not immediately installed.
Guidelines for Proper Disposal
Electronic waste requires special disposal methods. Do not place LED mirror lights in regular household recycling bins or trash. They contain trace amounts of heavy metals. These include lead and arsenic in their microchips. They also have recyclable components like circuit boards.
To safely dispose of LED mirror lights, follow these preparation steps before recycling:
- Turn off the light. Carefully remove the bulb from its fixture.
- Wrap the LED bulb to prevent it from breaking during transportation.
- If disposing of LED string lights, remove them from any displays or decorations.
Recommended methods for safely disposing of LED mirror lights include:
- Drop-off Locations: Many big box home improvement stores accept LED light bulbs for recycling. Municipal safety departments also often accept LED recycling.
- Mail-back Services: Organizations offer pre-paid recycling kits. You can order a kit, fill it with your bulbs, and arrange for pickup.
- Local Waste Collection Agencies: Contact your local agency or visit search.Earth911.com. Find collection schedules or drop-off locations.
- Retailer In-Store Recycling: Many hardware stores offer in-store recycling. Check with specific stores for participation.
- Waste Management (WM): WM offers at-home collection and recycle-by-mail services.
Regulatory Compliance for Your LED Bathroom Mirror Light GM1111
Understanding regulatory compliance ensures product safety and quality. It also clarifies consumer rights.
Certifications and Industry Standards
The LED Bathroom Mirror Light GM1111 holds several important certifications. These include:
- CE
- UL
- ETL
These certifications confirm the product meets specific safety and quality standards. They assure consumers of its reliability.
Understanding Warranty Information
The manufacturer provides a warranty for the LED Bathroom Mirror Light GM1111.
- Warranty Period: The warranty lasts for 2 years.
- Coverage: It covers damage or defects during normal usage.
- Claim Process: Contact the company to initiate a warranty claim.
- Resolution: The company will offer a replacement or a refund.
- Provider: This is a manufacturer’s warranty.
Proper installation ensures the safe and optimal operation of your LED Bathroom Mirror Light GM1111. It guarantees full functionality and extends the product’s lifespan. Consistent maintenance preserves the mirror’s aesthetic appeal and its advanced features. Regular care prevents common issues and keeps the mirror looking its best. By following these guidelines, users enjoy the enhanced functionality and sophisticated aesthetic of their mirror light for many years. This maximizes their investment and improves their daily routine.
FAQ
How does one clean the LED Bathroom Mirror Light GM1111?
Users should apply a mild, ammonia-free glass cleaner to a microfiber cloth. Wipe the mirror surface gently. Use a second dry microfiber cloth to buff the mirror. This prevents streaks. Avoid spraying cleaner directly onto the mirror.
What should users do if the mirror light does not turn on?
Users should first check the circuit breaker. Ensure it is “ON.” Verify the power cord is securely plugged in. Test the outlet with another device. Clean the touch sensor area if applicable.
Is professional installation recommended for the LED Bathroom Mirror Light GM1111?
Yes, professional installation is highly recommended. A licensed electrician ensures compliance with local electrical codes. They also guarantee safe wiring practices. This minimizes risks, especially in wet bathroom environments.
How can users prevent condensation inside the mirror?
Users should install an exhaust fan with appropriate CFM for the bathroom size. Run it during and after showers. Consider opening windows for natural ventilation. LED bulbs also emit less heat, which helps reduce condensation.
What causes flickering or dimming problems with the mirror light?
Driver malfunctions or voltage fluctuations can cause flickering. Incompatible dimmer switches also create issues. Loose wiring, overloaded circuits, or low-quality LED bulbs are other potential causes.
Can the LED Bathroom Mirror Light GM1111 integrate with smart home systems?
Yes, the mirror light often works with popular smart home platforms. These include Amazon Alexa, Google Assistant, and Apple HomeKit. Users should check product specifications for specific compatibility details.
How does one adjust the brightness and color temperature?
Users can adjust brightness and color temperature using touch controls on the mirror surface. A simple tap or hold often changes the intensity. This allows for various lighting moods and practical applications.
Post time: Nov-26-2025


