


Quick action resolves most LED Mirror Light issues. Users often encounter problems such as faulty power outlets, loose wiring, defective switches, or burnt-out LED bulbs. Flickering may result from voltage fluctuations or incompatible dimmer switches. Dimming frequently points to faulty transformers or power supplies.
Safety remains essential. Always disconnect power before any inspection or repair.
- Common problems:
- Power loss or intermittent lighting
- Flickering or dimming
- Sensor or touch control failures
- Physical or water damage
Key Takeaways
- Always turn off power before inspecting or repairing LED mirror lights to ensure safety.
- Check power supply, wiring, and wall switches first if the mirror light does not turn on.
- Use LED-compatible dimmer switches with dimmable bulbs to prevent flickering and buzzing.
- Clean sensors and touch control panels weekly to keep them responsive and free from moisture or dirt.
- Replace aging or damaged LED strips and clean light panels regularly to maintain brightness.
- Inspect wiring and connections for looseness or damage to avoid intermittent power or partial lighting.
- Ensure proper installation and ventilation to prevent uneven lighting, overheating, and electrical hazards.
- Seek professional help for complex electrical issues, persistent problems, or when unsure about repairs.
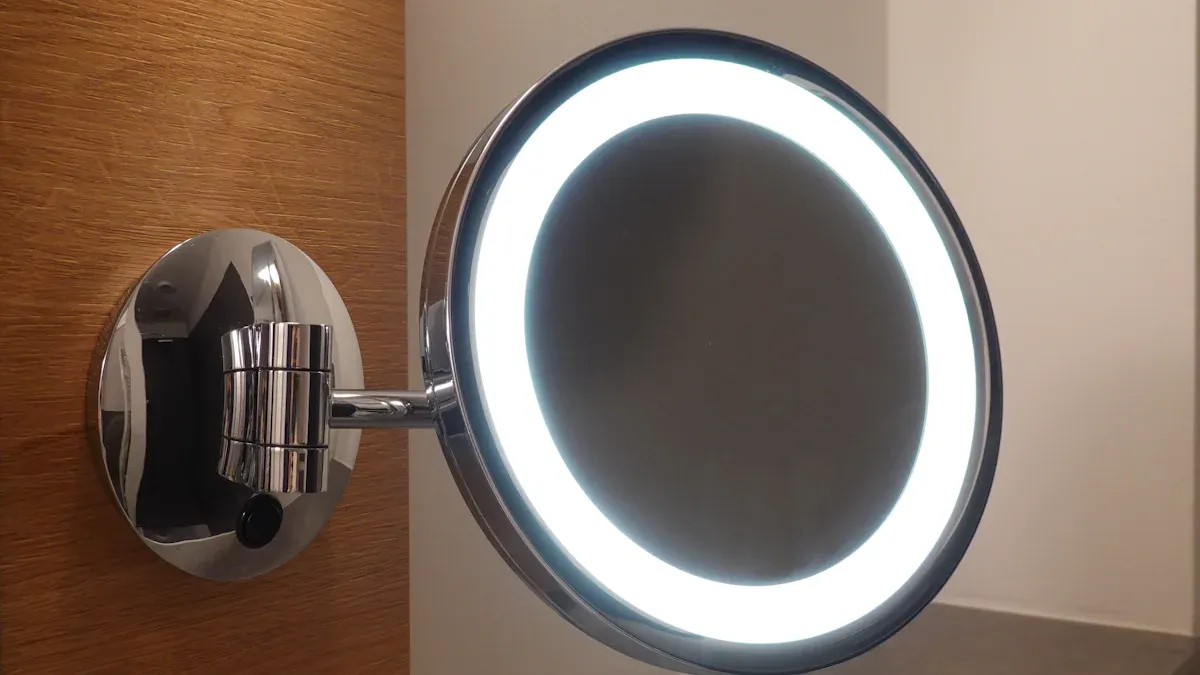
LED Mirror Light Power Troubleshooting
LED Mirror Light Not Turning On
Power Supply Check
A non-functioning LED mirror light often points to issues with the power supply. Electrical safety organizations recommend a systematic approach to troubleshooting:
- Turn off the power at the circuit breaker before starting any inspection.
- Inspect the power cord for visible damage or loose connections.
- Test the wall outlet using a multimeter or by plugging in another device.
- Check the circuit breaker for tripping and reset if necessary.
- Examine the transformer for signs of overheating or buzzing noises.
- Confirm that all wiring connections are secure and properly insulated.
Tip: Always ensure the installation site remains dry and free from obstructions to prevent electrical hazards.
Manufacturers identify several common causes for power failures. The table below summarizes these issues:
| Common Cause Category | Specific Causes | Explanation |
|---|---|---|
| Power Supply Problems | Loose/damaged cords, tripped breakers, faulty transformers, grounding | Interruptions in power delivery prevent the mirror from turning on. |
| Wiring Issues | Loose/disconnected wires, corrosion | Faulty wiring disrupts electrical flow to the LEDs. |
| Sensor Problems | Moisture, dirt, sensor failure | Environmental factors or internal faults can stop the mirror from activating. |
| Environmental Factors | Electrical interference, moisture damage | External noise or water ingress can damage circuits or cause malfunction. |
Wall Switch and Outlet Inspection
Wall switches and outlets play a crucial role in powering LED mirror lights. A faulty switch or outlet can interrupt the power supply. Begin by toggling the wall switch and observing any response from the mirror. If the light remains off, test the outlet with another device. If the outlet fails, check the circuit breaker and reset if needed. For outlets that work, inspect the wiring behind the mirror for loose or disconnected wires. Proper grounding and secure connections ensure reliable operation.
Note: If the mirror uses a touch sensor, verify its alignment and cleanliness, as dirt or misalignment can prevent activation.
Intermittent Power in LED Mirror Light
Loose Wiring Connections
Intermittent power often results from loose wiring. Vibrations during installation or daily use can loosen connections. Technicians recommend checking all wiring points for security. Use a multimeter to test for voltage stability. Re-secure any loose wires and ensure proper insulation. Regular inspection helps prevent recurring issues.
Faulty Electrical Wiring
Faulty electrical wiring, such as damage from moisture or physical impact, can sever connections and cause power interruptions. Inspect the wiring for visible damage or corrosion. If the wiring appears intact but problems persist, consider other components like dimmer switches or LED drivers. Complex wiring issues may require professional assistance to ensure safety and compliance with electrical standards.
Always prioritize safety. If unsure about handling electrical components, seek help from a qualified electrician.
Fixing Flickering and Dimming LED Mirror Light
Flickering LED Mirror Light
Dimmer Switch Compatibility
Many users experience flickering in their LED mirror lights due to incompatible dimmer switches. Not all dimmers work with LED technology. Traditional dimmer switches, designed for incandescent bulbs, often fail to provide the correct electrical characteristics for LEDs. This mismatch can cause flickering, buzzing, or even shorten the lifespan of the light. To ensure smooth and reliable dimming, homeowners should use dimmable LED bulbs paired with LED-compatible dimmer switches.
- Dimmable LED bulbs and LED-compatible dimmers are both necessary for proper performance.
- Traditional dimmers may cause flickering, buzzing, or reduced bulb life.
- LED-compatible dimmers handle lower voltage and current, providing smooth, flicker-free dimming.
- Always check manufacturer specifications for compatibility with bulb type and wattage.
- Incompatible dimmers can lead to poor dimming and early failure of the LED Mirror Light.
Tip: Always verify that both the LED bulbs and the dimmer switch are designed to work together before installation.
Voltage Fluctuation Issues
Voltage fluctuations in the home’s electrical system can also cause flickering. Sudden drops or spikes in voltage disrupt the steady flow of electricity to the LED mirror light. These fluctuations may result from overloaded circuits, faulty wiring, or external power surges. Installing surge protectors and ensuring the electrical system is up to code can help prevent these issues. If flickering persists, a licensed electrician should inspect the wiring and circuit load.
Dimming or Low Brightness in LED Mirror Light
Aging or Burnt-Out LED Strips
Over time, LED strips naturally lose brightness. Most LED mirror lights have a lifespan between 20,000 and 50,000 hours, but environmental factors such as heat and humidity can shorten this period. As LED strips age, their light output gradually decreases, leading to dimming. Regular use in bathrooms, where moisture and temperature fluctuate, can accelerate this process.
- LED strips typically last 3-10 years, depending on quality and usage.
- Brightness reduction occurs as LEDs approach the end of their rated lifespan.
- Heat buildup and poor ventilation can speed up aging and dimming.
- Replacing aging or burnt-out LED strips restores full brightness.
Note: Repairing or replacing backlight components is often more cost-effective than replacing the entire mirror.
Dirty or Blocked Light Panels
Dirt, dust, or residue on the light panels can block or diffuse the light, making the mirror appear dim. Regular cleaning with a soft, dry cloth helps maintain optimal brightness. In bathrooms, moisture can also cause fogging or water spots on the panels. Keeping the mirror and its surroundings dry and clean prevents buildup that can reduce light output. If cleaning does not resolve the issue, check for internal blockages or consult the manufacturer’s maintenance guide.
| Common Cause | Solution |
|---|---|
| Aging LED strips | Replace with new, high-quality LED strips |
| Heat buildup | Improve ventilation, use heat sinks |
| Dirty or blocked panels | Clean panels regularly, keep area dry |
| Voltage or wiring issues | Inspect and repair connections, use surge protection |
Regular maintenance and proper installation extend the lifespan and performance of LED mirror lights.
LED Mirror Light Sensor and Touch Control Issues
Unresponsive LED Mirror Light Sensor
Obstructed Sensor Area
Many users encounter unresponsive sensors in their LED mirror lights. Several factors can cause this issue:
- Loose or disconnected wiring disrupts sensor signals.
- Moisture from humid bathrooms interferes with sensor operation.
- Dust, oils, or dirt on the sensor surface block detection.
- Damaged or worn sensors fail to respond.
- Power supply problems, such as faulty plugs or outlets, prevent activation.
Environmental factors play a significant role. High humidity in bathrooms allows moisture to penetrate the mirror housing, which can lead to rust and sensor malfunction. Dust and dirt accumulation on the sensor surface further reduce responsiveness. Regular cleaning with a soft, dry cloth helps maintain sensor performance and prevents signal blockage.
Tip: Clean the sensor area weekly to avoid dust and moisture buildup. This simple step can restore proper function and extend the life of the sensor.
Sensor Calibration Steps
Manufacturers recommend a systematic approach to troubleshooting unresponsive sensors:
- Test the power supply by plugging the mirror into a different outlet or checking the battery charge if applicable.
- Inspect internal wiring for loose or damaged connections. Seek professional help if wiring issues are suspected.
- Clean the sensor gently with a soft, dry cloth to remove dust, stains, or moisture.
- Reset the mirror by turning off the power, waiting a few minutes, and turning it back on. Use the reset button if available.
- Reduce electrical interference by moving nearby electronic devices away from the mirror.
- If the sensor remains unresponsive, contact the manufacturer for technical support or consider sensor replacement.
These steps address the most common causes of sensor failure and help restore normal operation.
LED Mirror Light Touch Controls Not Working
Moisture or Dirt on Control Panel
Touch controls in LED mirror lights often stop working due to environmental factors. Moisture from showers or handwashing can seep into the control panel, causing temporary or permanent malfunctions. Dust, oils, and fingerprints also interfere with touch sensitivity. Regular cleaning with a dry, lint-free cloth keeps the control panel responsive.
- Power supply issues, such as faulty plugs or damaged cords, can prevent touch controls from working.
- Dirty or obstructed panels block touch signals.
- Electrical wiring problems, including loose or damaged connections, disrupt control functions.
Note: Always dry your hands before using the touch controls to prevent moisture-related issues.
Faulty Touch Control Panel
Sometimes, touch controls become unresponsive due to internal faults. Electrical surges, wear, or damage to the touch control system may require repair or replacement. If cleaning and resetting do not resolve the problem, check the power source and wiring. Resetting the mirror by turning off the power and turning it back on can sometimes restore function. If the issue persists, replacing the touch control panel may be necessary.
| Common Cause | Recommended Action |
|---|---|
| Power supply problems | Check plugs, outlets, and cords |
| Dirty or wet control panel | Clean and dry the panel |
| Wiring issues | Inspect and secure connections |
| Faulty touch controls | Reset or replace the panel |
Regular maintenance and prompt troubleshooting ensure reliable performance of LED mirror light touch controls.
Resolving Uneven or Partial LED Mirror Light Illumination

One Side of LED Mirror Light Not Working
Burnt-Out LED Segments
When one side of a mirror light stops working, burnt-out LED segments often cause the problem. These segments can create an open circuit, which interrupts the flow of electricity. As a result, a section or one side of the mirror light may go dark. Burnt-out LEDs may result from age, power surges, or mechanical damage. Sometimes, a component inside the fixture becomes dislodged, leading to failure.
- Burnt-out segments disrupt electrical continuity.
- Mechanical damage or faulty solder joints can also cause outages.
- Reheating solder joints may restore function in some cases.
- If the fixture remains under warranty, replacing it may be the best option.
Tip: Always check for warranty coverage before attempting repairs, as this can save time and money.
Disconnected or Damaged Wires
Disconnected or damaged wires frequently lead to partial illumination. During installation or routine use, wires may loosen or break. Moisture and humidity in bathrooms can also corrode wiring, causing poor connections. Technicians recommend inspecting all wiring for visible damage or corrosion. Secure and properly insulated wires ensure reliable operation.
- Loose wiring interrupts power to specific segments.
- Corroded wires reduce electrical flow and may cause flickering.
- Replacing damaged wires with new, insulated ones restores full illumination.
Uneven LED Mirror Light Distribution
Installation Errors
Improper installation remains a leading cause of uneven light distribution. When installers fail to secure wiring or calibrate the LED setup correctly, the mirror may display bright and dim areas. Voltage fluctuations and loose connections can also contribute to this issue. Ensuring that all wiring is tight and the LED system is calibrated helps prevent uneven illumination.
Note: Professional installation reduces the risk of uneven lighting and ensures optimal performance.
Defective LED Modules
Defective LED modules can create patchy or inconsistent lighting. Several steps help identify and resolve these problems:
- Test the power source to confirm it supplies electricity.
- Inspect internal wiring for looseness or damage; replace faulty wires.
- Check the switch for proper operation and replace if necessary.
- Replace defective LED chips or strips if accessible.
- Repair or replace the power supply unit and backlight panels if needed.
- Clean and recalibrate sensors, especially in smart mirrors.
- Use replacement parts that match the original specifications.
- Upgrade to higher-quality or more energy-efficient LEDs for better results.
- For complex issues, seek professional repair services.
Many budget mirrors use LED strips on only one or two sides, which can cause stripy or uneven lighting. High-end mirrors achieve even illumination by using full surround LED strips and light diffusers. Voltage drop along long LED strips or low LED density can also create uneven effects. Upgrading to high-density strips and using additional power supplies for longer runs can resolve these issues.
Regular maintenance and quality components help maintain even, bright illumination in any LED mirror light.
Addressing Noises and Overheating in LED Mirror Light
Buzzing or Humming LED Mirror Light
Electrical Interference
Buzzing or humming noises can disrupt the calm atmosphere of a bathroom. Many users notice a faint buzzing sound, especially when dimming their lights. This noise often results from the internal components of the LED driver, particularly the filter elements and the current spikes that occur during dimming. The sound usually intensifies around 50% brightness and fades at lower levels. Incompatibility between dimmer switches and LED bulbs remains a leading cause. Conventional dimmers, designed for incandescent bulbs, do not match the electrical requirements of modern LEDs. As a result, users may hear buzzing or humming.
- LED lights may buzz more when paired with non-LED-compatible dimmers.
- The noise typically increases at mid-range brightness settings.
- Upgrading to forward phase C*L dimmers or reverse phase electronic low voltage dimmers can reduce or eliminate buzzing.
Tip: Always check the compatibility of dimmer switches with LED bulbs before installation to minimize unwanted noise.
Some users suspect electrical interference as the source of buzzing. However, experts explain that if the noise comes directly from the mirror and not from external relay modules or switches, electrical interference is unlikely. The issue almost always originates within the mirror’s own components.
Loose Internal Components
Loose internal parts can also cause buzzing or humming. Over time, vibrations from daily use or installation may loosen screws or mounting brackets inside the mirror housing. These loose parts can vibrate when electricity flows through the system, producing a humming sound. Regular inspection and tightening of internal components help prevent this issue. If the noise persists after checking dimmer compatibility and securing all parts, professional servicing may be necessary.
Overheating LED Mirror Light
Poor Ventilation
Proper ventilation is essential for maintaining safe operating temperatures. When mirrors are installed in enclosed spaces or surrounded by materials that trap heat, the risk of overheating increases. Dust buildup on LED strips and mirror surfaces can also trap heat, further raising temperatures. Regular cleaning and ensuring adequate airflow around the mirror help dissipate heat effectively.
- Install mirrors in open areas with good airflow.
- Clean LED strips and mirror surfaces to prevent dust accumulation.
- Avoid placing mirrors in tight, enclosed spaces.
| Safety Risks Associated with Overheating | Preventive Measures Recommended |
|---|---|
| Fire hazards due to heat buildup | Ensure proper ventilation |
| Burns from hot surfaces | Maintain spacing around bulbs |
| Reduced LED lifespan | Use certified, high-quality products |
| Heat retention from coverings | Avoid covering lights |
| Overloading fixtures | Follow manufacturer wattage guidelines |
| Dust acting as an insulator | Clean regularly |
| Improper installation | Use professional installation |
| Flammable materials nearby | Keep flammable items away |
Overloaded Electrical Circuits
Overloading electrical circuits can also lead to overheating. Exceeding the recommended wattage or connecting too many devices to a single circuit increases the risk of heat buildup. Always follow manufacturer guidelines for wattage and installation. Professional installation ensures compliance with local electrical codes and reduces the risk of overheating. Regular inspections help identify and correct overloaded circuits before they cause damage.
Note: Overheating not only shortens the lifespan of LEDs but can also pose fire hazards if left unaddressed. Prevention through proper installation, ventilation, and maintenance remains the best approach.
Managing Water and Physical Damage in LED Mirror Light
Water Damage in LED Mirror Light
Moisture Inside Mirror Housing
Water damage remains a significant concern for bathroom mirrors with integrated lighting. Repair professionals often identify several common causes:
- Inadequate edge sealing allows water and steam to penetrate the mirror housing.
- Low IP ratings fail to provide sufficient protection against moisture in humid environments.
- Poor drainage design does not divert water away from sensitive electrical circuits.
Improper sealing around the mirror edges frequently leads to water and steam reaching electrical components. This risk increases when users select mirrors with insufficient IP ratings for bathroom use. Signs of water infiltration include bubbling or discoloration at the base of the mirror, which signals the need for immediate resealing. To prevent these issues, experts recommend applying a clear silicone sealant to the mirror edges annually. Selecting mirrors with an IP44 rating or higher for standard bathrooms, and IP65 for areas near showers, offers better protection against moisture.
Tip: Regularly inspect the mirror edges for signs of bubbling or peeling. Early detection helps prevent more severe water damage.
Corroded Electrical Components
Moisture inside the mirror housing can cause corrosion of electrical components. Water ingress typically leads to electrical hazards and damages the internal parts by allowing moisture to reach the circuitry. This exposure results in malfunctions, reduced lifespan, and potential safety risks such as electrical shock. Bathrooms present a challenging environment due to constant humidity and water splashes. The IP rating system measures a product’s resistance to solids and liquids. Higher IP ratings ensure better protection, maintaining the safety and performance of the mirror light.
A table below summarizes prevention and response strategies:
| Problem | Prevention/Response |
|---|---|
| Moisture ingress | Annual sealing, high IP-rated mirrors |
| Corroded components | Prompt drying, professional inspection |
| Electrical hazards | Use of surge protectors, regular checks |
Physical Damage to LED Mirror Light
Cracked or Broken Mirror Panels
Physical damage occurs frequently in bathroom mirrors. The most common issues include cracks, chips, and broken glass. Accidental impacts, insecure installation, and contact with sharp objects often cause these problems. Minor cracks may be repaired using specialized mirror repair kits. However, extensive damage usually requires full mirror replacement. Secure mounting during installation helps prevent future incidents.
- Cracks and chips often result from accidental bumps or falls.
- Scratches may occur during cleaning or bulb replacement.
- Poor installation increases the risk of breakage.
Note: Always handle mirrors with care during installation and maintenance to avoid accidental damage.
Safe Replacement Procedures
When a mirror panel sustains significant damage, safe replacement becomes essential. Begin by disconnecting the power supply to eliminate electrical hazards. Wear protective gloves and eyewear to prevent injury from broken glass. Carefully remove the damaged mirror, ensuring no shards remain in the frame. Install the new panel according to the manufacturer’s instructions, securing all fasteners and checking for proper alignment. After installation, restore power and test the lighting functions.
A checklist for safe replacement:
- Disconnect power at the breaker.
- Wear safety gear.
- Remove damaged glass and debris.
- Install the new mirror panel securely.
- Reconnect power and test operation.
Proper handling and installation extend the lifespan of the mirror and maintain a safe bathroom environment.
DIY vs. Professional Help for LED Mirror Light
Safe DIY LED Mirror Light Fixes
Basic Power and Wiring Checks
Homeowners can address several common issues with simple tools and safety precautions. Before starting any maintenance, they should always disconnect the power to prevent electrical hazards. Regular inspection of power cords and connections helps identify damage or looseness early. Many users can safely perform the following tasks:
- Power cycling the mirror by unplugging it for about 60 seconds and reconnecting.
- Checking and reseating electrical connections by opening the backing panel and ensuring wires are secure.
- Replacing damaged LED strips by identifying the correct model and installing a compatible replacement.
- Changing bulbs by removing the compartment cover and inserting a new bulb of the correct type.
A basic toolkit for these tasks includes:
| Tool/Material | Purpose |
|---|---|
| Multimeter | Checking voltage and continuity |
| Screwdriver set | Opening panels and covers |
| Electrical tape | Securing wiring |
| Replacement parts | Matching original specifications |
| Protective gloves | Personal safety |
| Safety glasses | Eye protection |
Tip: Always use a soft cloth to clean the mirror surface and wear gloves to avoid fingerprints or injury.
Cleaning and Minor Adjustments
Routine cleaning and minor adjustments help maintain optimal performance. Users should wipe the mirror and control panels with a soft, dry cloth to remove dust, moisture, and fingerprints. They should also check for signs of moisture ingress and ensure the mirror is installed away from direct water sources. Good ventilation reduces the risk of condensation and corrosion. When changing bulbs, users should turn off the power, remove the cover, and replace the bulb with one that matches the mirror’s specifications.
When to Call a Professional for LED Mirror Light
Complex Electrical or Component Issues
Some problems require professional expertise. If users encounter complex electrical faults, such as internal wiring issues, power supply failures, or broken backlight panels, they should contact a qualified technician. Electrical work involving outlets or circuit boards falls outside the scope of safe DIY repairs. If the wiring inside the mirror looks loose or disconnected and the user feels unsure, a professional should handle the repair.
Persistent or Worsening Problems
Persistent flickering, repeated power loss, or unresponsive controls after basic troubleshooting signal deeper issues. If simple fixes do not resolve the problem, or if the mirror continues to malfunction, professional diagnosis becomes necessary. Safety concerns and lack of confidence in handling electrical repairs are valid reasons to seek expert help. Electricians have the training and tools to address complex faults and ensure compliance with safety standards.
Note: Prioritizing safety and knowing personal limits protects both the user and the mirror. Professional intervention ensures long-term reliability and peace of mind.
Troubleshooting common mirror light problems involves checking power, wiring, sensors, and cleaning components. Safety always comes first. Users should recognize when to seek professional help.
For quick reference, use this checklist:
- Inspect power supply and connections
- Clean sensors and control panels
- Replace damaged or aged parts
- Ensure proper installation and ventilation
FAQ
What should users do if their LED mirror light will not turn on?
Check the power supply first. Inspect the wall outlet and circuit breaker. Examine all wiring connections for security. If the problem persists, consult a qualified electrician for further diagnosis.
How often should users clean LED mirror light sensors and panels?
Clean sensors and panels once a week. Use a soft, dry cloth to remove dust, fingerprints, and moisture. Regular cleaning helps maintain optimal performance and extends the lifespan of the mirror light.
Can users replace LED strips in their mirror lights themselves?
Yes, users can replace LED strips if they follow safety guidelines. Always disconnect power before starting. Use replacement strips that match the original specifications. If unsure, seek professional assistance.
Why does the LED mirror light flicker when dimmed?
Flickering often results from incompatible dimmer switches. Use only LED-compatible dimmers with dimmable LED bulbs. Voltage fluctuations or loose wiring may also cause flickering.
What IP rating is recommended for bathroom LED mirror lights?
Select mirrors with at least an IP44 rating for standard bathrooms. For areas near showers or high humidity, choose IP65-rated products. Higher IP ratings offer better protection against moisture.
When should users call a professional for LED mirror light repairs?
Contact a professional for complex electrical issues, persistent malfunctions, or visible damage to internal components. Safety concerns and repeated failures require expert attention.
Post time: Aug-06-2025


